Quickstart
Let’s get you up and running with your first workflow on your local machine.
What you’ll need
- Python 3.10+ in a virtual environment
Install the SDK
Install the flyte package:
pip install 'flyte[tui]'tui extra to enable the terminal user interface.Verify it worked:
flyte --versionOutput:
Flyte SDK version: 2.*.*Configure
Create a config file for local execution. Runs will be persisted locally in a SQLite database.
flyte create config --local-persistenceThis creates .flyte/config.yaml in your current directory. See
Setting up a configuration file for more options.
flyte get config to check which configuration is currently active.Write your first workflow
Create hello.py:
# hello.py

import flyte

# The `hello_env` TaskEnvironment is assigned to the variable `env`.
# It is then used in the `@env.task` decorator to define tasks.
# The environment groups configuration for all tasks defined within it.
env = flyte.TaskEnvironment(name="hello_env")

# We use the `@env.task` decorator to define a task called `fn`.
@env.task
def fn(x: int) -> int: # Type annotations are required
    slope, intercept = 2, 5
    return slope * x + intercept

# We also use the `@env.task` decorator to define another task called `main`.
# This is the is the entrypoint task of the workflow.
# It calls the `fn` task defined above multiple times using `flyte.map`.
@env.task
def main(x_list: list[int] = list(range(10))) -> float:
    y_list = list(flyte.map(fn, x_list)) # flyte.map is like Python map, but runs in parallel.
    y_mean = sum(y_list) / len(y_list)
    return y_mean
Here’s what’s happening:
TaskEnvironmentspecifies configuration for your tasks (container image, resources, etc.)@env.taskturns Python functions into tasks that run remotely- Both tasks share the same
env, so they’ll have identical configurations
Run it
Create a project directory and place your files there:
.
├── hello.py
└── .flyte
    └── config.yaml
Do not run flyte run from your home directory. Flyte packages the current directory when running remotely, so running from $HOME would attempt to bundle your entire home folder. Always work from a dedicated project directory.
Run the workflow:
flyte run --local hello.py mainThis executes the workflow locally on your machine.
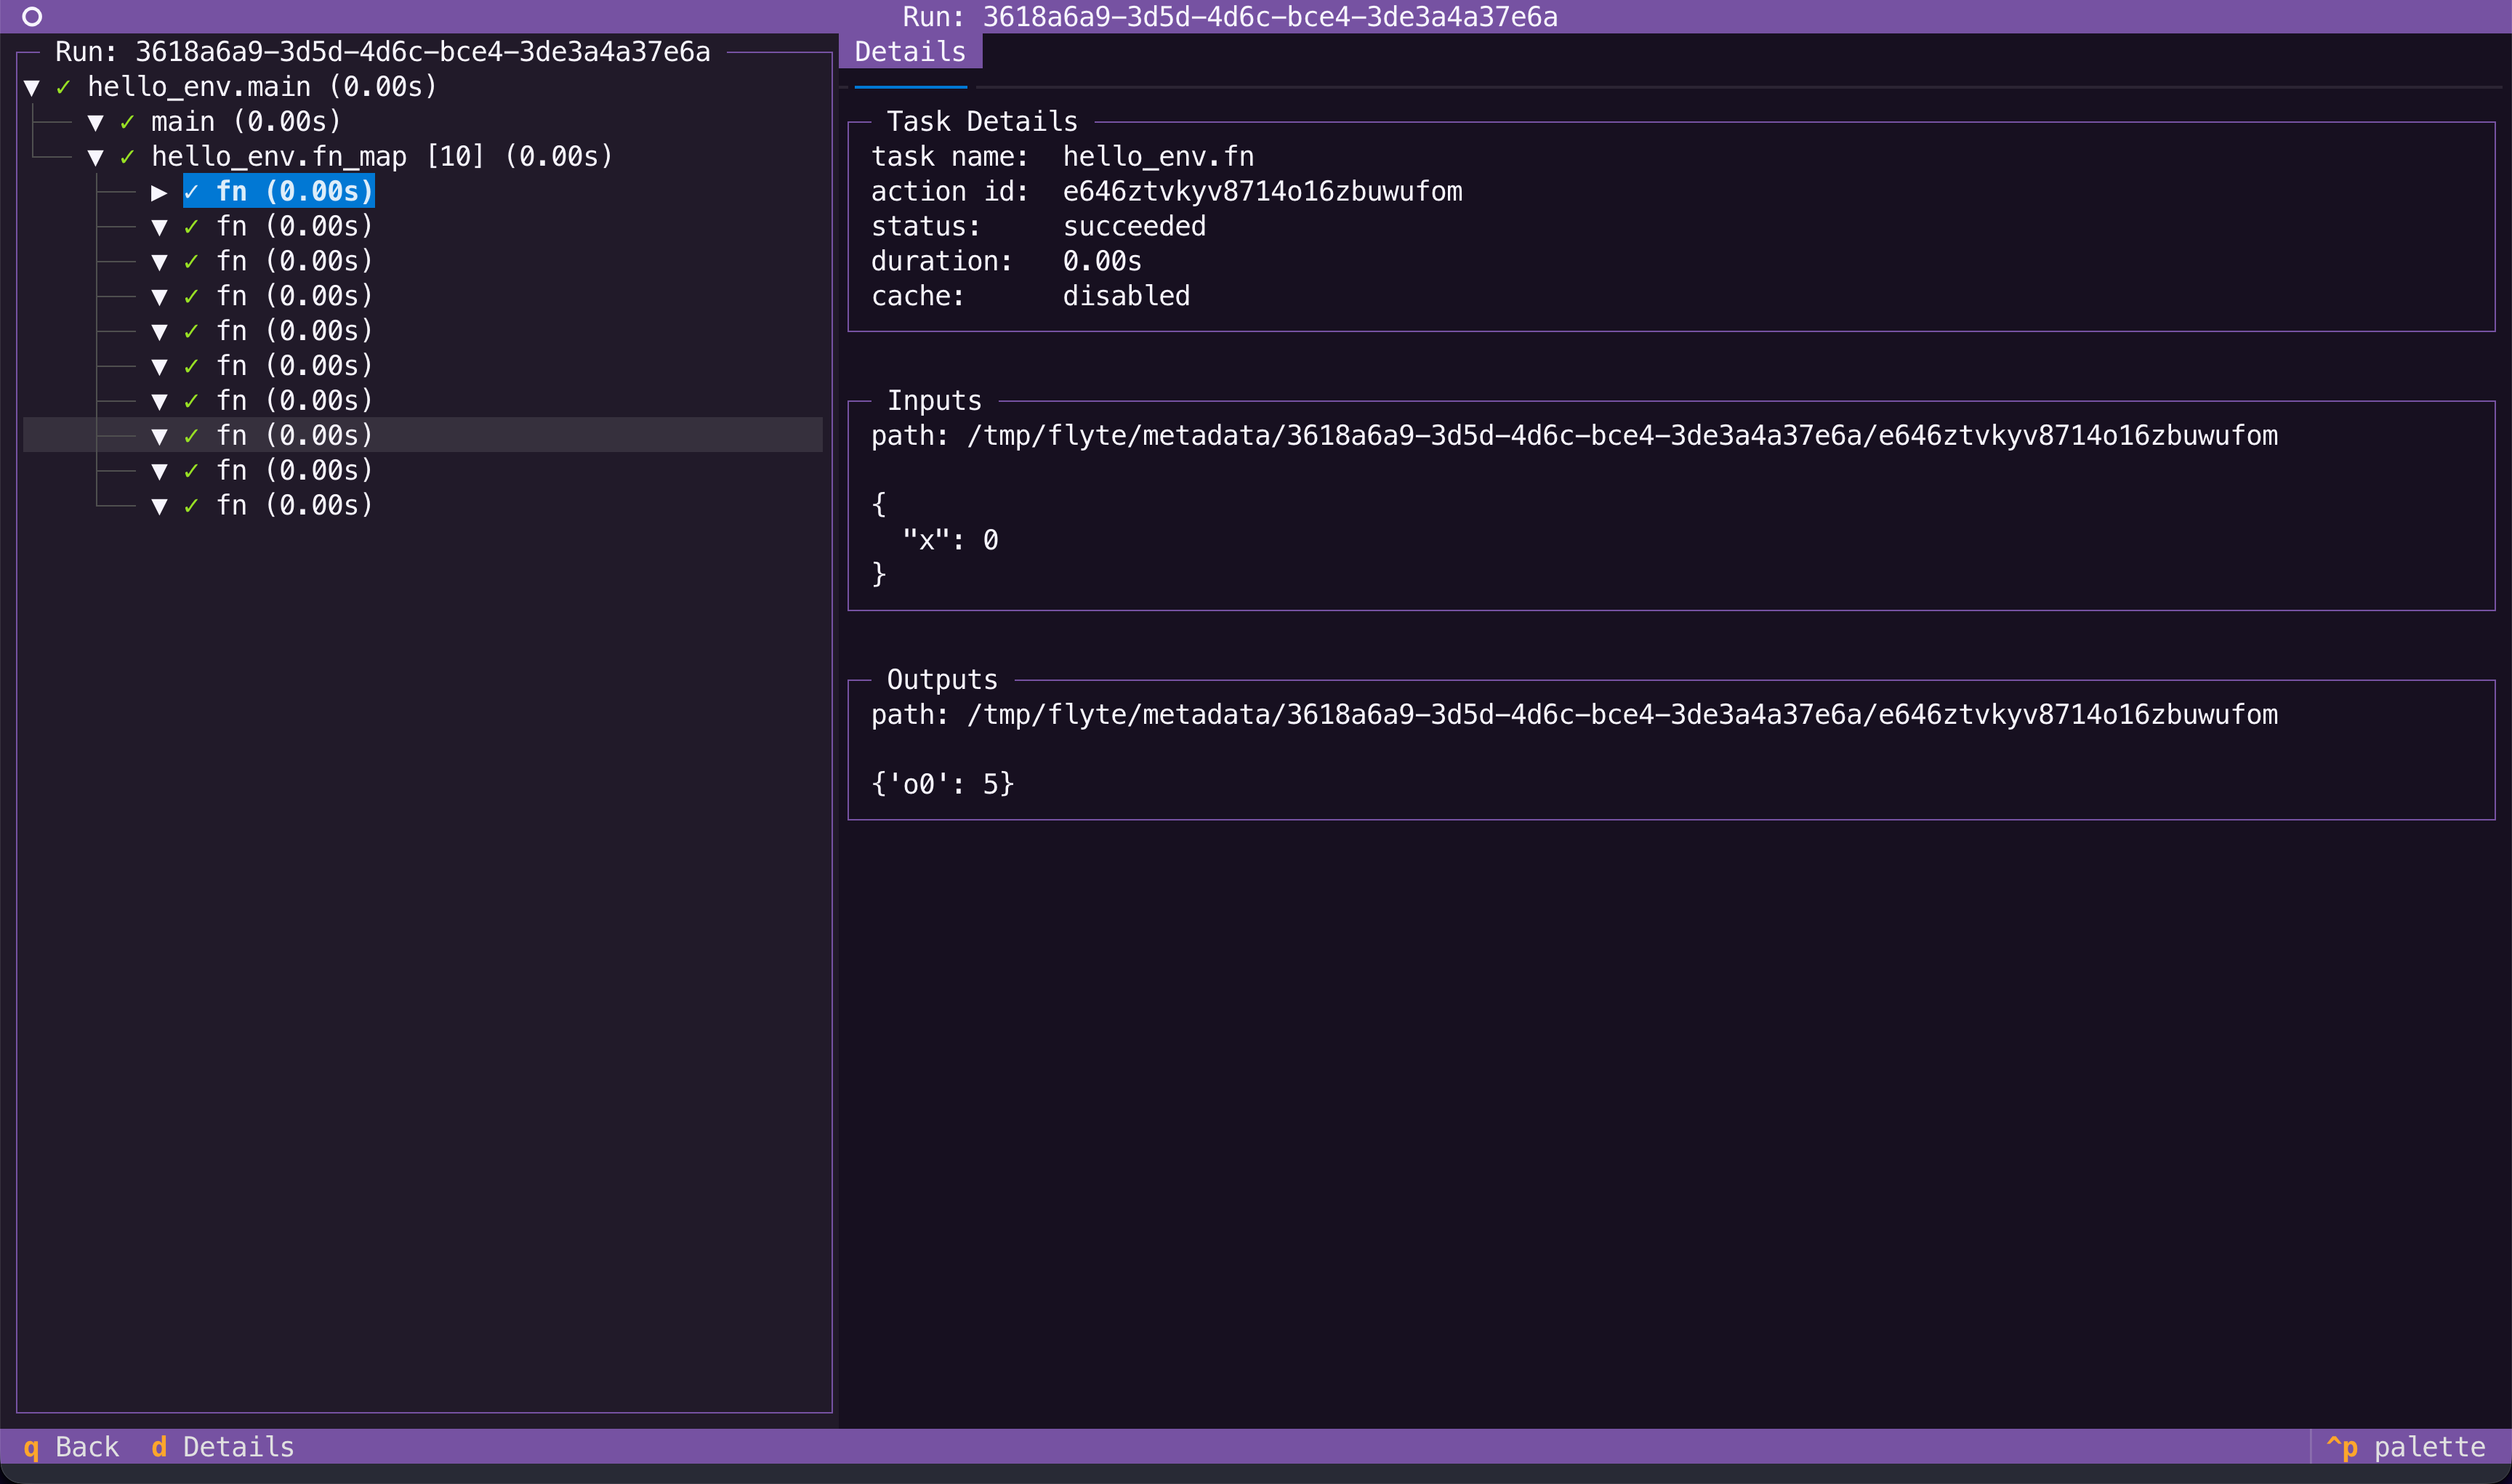
See the results
You can see the run in the TUI by running:
flyte start tuiThe TUI will open into the explorer view

To navigate to the run details, double-click it or press Enter to view the run details.
Next steps
Now that you’ve run your first workflow:
- Core concepts: Understand the core concepts of Flyte programming
- Running locally: Learn about the TUI, caching, and other features that work locally
- Connecting to a cluster: Configure your environment for remote execution